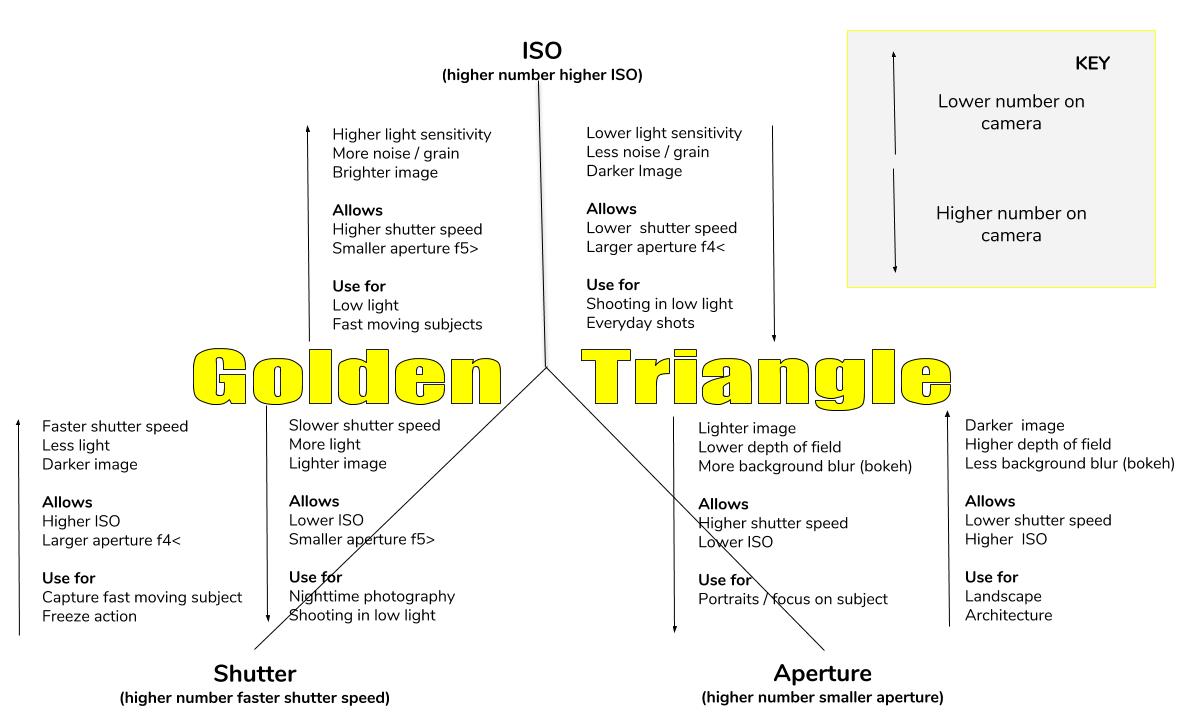
Photography Golden Triangle
One of the most confusing areas in photography has to be what is known as The Golden Triangle or The Three Pillars of Photography, this being ISO, Aperture and Shutter Speed. I get tons of questions about trying to get out of Auto and move into Manual mode.
The simple way to use these to change your photography is remember this simple statement
“You change one, you change them all”
This post is a guide to exactly what ISO, Aperture and Shutter Speed are and what they do and how they effect your photos, plus the relationship between them. Plus as a little bonus I have drawn up a chart for you to download and keep to help you in the field or where ever you need a quick reminder.

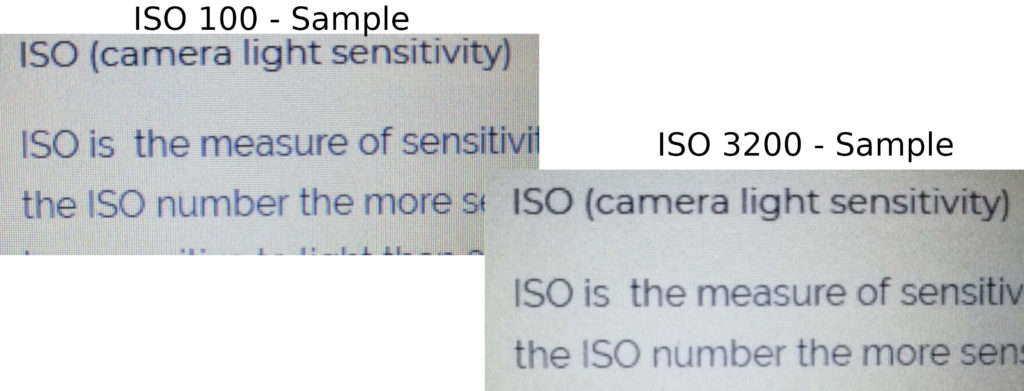
ISO (camera light sensitivity)
ISO is the measure of sensitivity to light the camera is. The higher the ISO number the more sensitive to light the camera is, ISO 100 is less sensitive to light than 3200,
Higher ISO is typically used when shooting in a low light situation such as night photography, concert photography, etc.
Lower ISO is typically used in ever day shots when a sharp crisp image is required.
ISO standard setting in most modern camera is 100
NOTES
- Higher ISO Allows
- Lighter images (increase light sensitivity)
- more image noise / grain
- The use of a faster shutter speed and a smaller aperture
- Shooting in low light conditions
- Lower ISO Allows
- Darker images (decreased light sensitivity)
- Less image noise / grain
- The use of a slower shutter speed and a higher aperture
- Shooting in normal light conditons (day light)
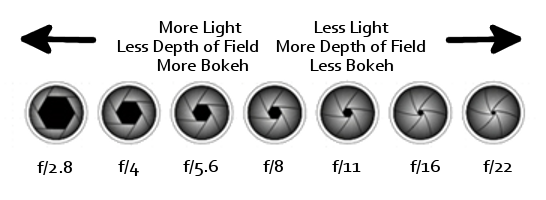
APERTURE
Aperture is a measure of the amount of light a lens lets into the camera. The lower the aperture value the more light enters the camera. f2.8 allows more light into the camera than f11.
A lens with a wider aperture such as f2.8 is known as a Fast Lens.
NOTES
- Lower Aperture Value Allows
- More light to enter the camera
- More background blur (bokeh)
- Lower depth of field
- The use of a faster shutter speed and a lower ISO
- Shooting in low light condtions
- Higher Aperture Value Allows
- Less lightto enter camera
- Less background blur
- Higher depth of field
- The use of a slower shutter speed and a higher ISO
- Shooting in normal daytime conditions
SHUTTER SPEED
Shutter speed is the speed at which the camera shutter operates and the camera captures the image, and subsequently the amount of time the sensor is exposed to light.
NOTES
- Faster Shutter Allows
- Less light into camera
- Freeze subject action
- Capturing of high speed subjects (1/200s and above)
- The use of a lower aperture and a higher ISO
- Handheld Shots (1/80s and above)
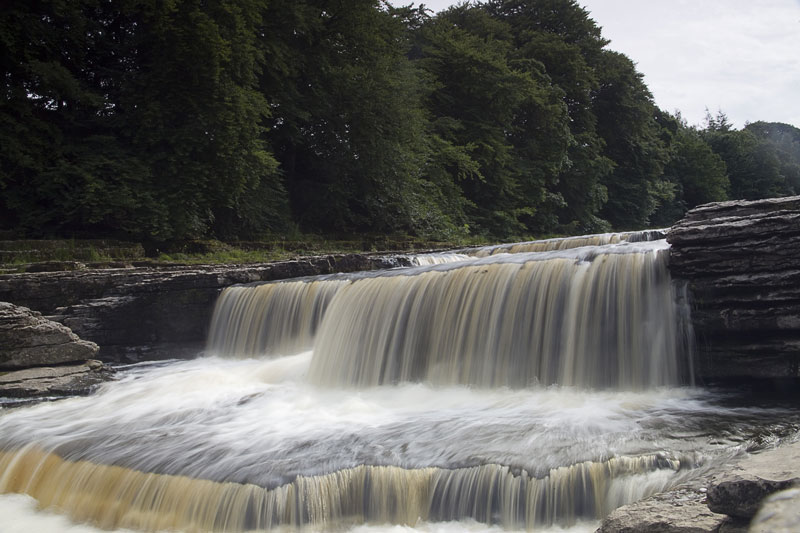
- Slower Shutter Allows
- More light into camera
- Creation of motion in shots (1/50s and ) lower
- Creation of smooth water and car trails
- The use of a higher aperture and a lower ISO
- Use of tripod to steady shots
In order to make it a bit easier to understand the relationship between ISO, Aperture and Shutter Speed I have drawn up a simply diagram below. If you would like to download a copy to use in the field or for you own use,please use the buttons below.