My Essential Kit
I thought I would mention some of the essential items I carry with me in my kit bag everywhere I go and I mean every shoot I go to these items apart from my Canon 7D and memory cards go with me.
UPDATE – I now also use a Canon 5D mk2 but all my other kit is the same.
Camera Bag – Lowepro Fastpack 350
I get asked this question alot, well apart from which camera do I use, what camera bag do I use.
 |
| Lowepro FastPack 350 |
The answer is simple I use a lowepro FastPack 350, I find it lightweight and full of features such as useful side mesh pockets, huge top pocket and of course quick access to your camera, all wrapped up in a ruck sack style bag, with enough space to happily hold two lenses and 2 flash units, along with anything else you can or wish to carry. I have found that what ever I have wanted to carry this bag has been more than big and strong enough to cope.
This bag also has space for a laptop, killing several birds with one stone, so to speak.
Battery Grip
 |
| Battery Grip |
I always have a battery grip attached to my camera, and although I use a non Canon grip it has worked without fail in some very harsh environements, from rain to sand, dust to darkness.
I find not only does the extra battery power make a big difference during longs shoot, as it holds two catteries as oppossed to one, but the additional features of the grip make using the camera a whole lot easier, as the extra side grip makes holding the camera on the side easier (for portraits) added with the extra shutter button makes picture taking a whole difference experience.
I also find that the extra weight added to the camera gives it better balance.
Remote Shutter Release Cable
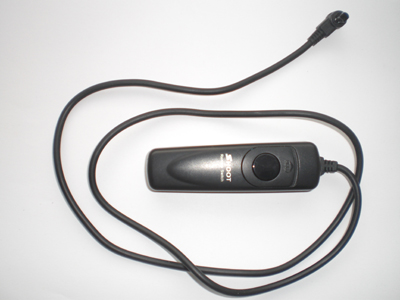 |
| Remote Shutter Release Cable |
One of the other things I always keep in my kit bag is a remote shutter release, and whilst I have an infrared remote for my camera, I find the cabled version a whole lot better to use. I think the fact that I know it is always ready to use, no worry about batteries, sunlight or anything else, makes it a great piece of kit to keep about me at all times.
The main reason for keeping this on me is that you never know what kind of shtos you want to take, and in my view its better to “have and not need than need and not have”.
Lens Pen
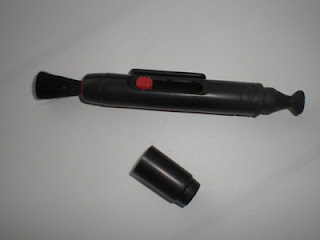 |
| Lens Pen Cleaning Tool |
The Lens Pen tool is such as god send and makes lens cleaning so easy, it is basically a little brush on one end and a cleaning pad on the other, it gets rid of marks on my lens way better than any cloth and the brush means I can easily remove dust, sand, dirt or any other dry stuff from my camera without damage.
Filters
The first thing to mention is that I always have a screw on UV filter attached to my lenses, as the UV filter does not have a great deal of effect to my shots, although it does absorb some UV light, it is a great way to protect your lens from getting scratched. After all its alot cheaper to replace the UV filter than it is to replace my lens.
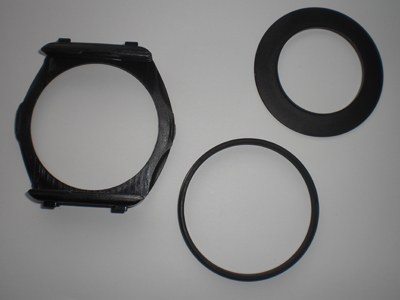 |
| Cokin P Filter Holder and Ring |
I always have in my bag my Cokin P filter holder, like I said before the bag is more than big enough to carry all the little extras I may need, so I keep my Cokin filter holder and adapter ring there in case I heed it. I use this type of filter as it allows me to simply buy different sized adapter rings for my different lenses, instead of buying the same filter for each lens.
 |
| Cokin P Filter – ND Filter |
This is because unlike screw on filters the cokin system has a lens ring attached to your lens, then the holder simply slides onto the holder then into that you can put an array of different filters as you can see from the above pictrue, the actual filters are all the same size, the only thing that changes is the adapter ring for the thread size of your lens. Much cheaper than buying screw on filters for all my lenses.
Multi-Tool
 |
| Multi Tool |
One of the most useful thing in my camera kit bag is my multi tool, it has come in handy so many times I just don’t know how I would cope without it, so I recommend to anyone out there to carry a multi-tool in there kit bag.
Flash
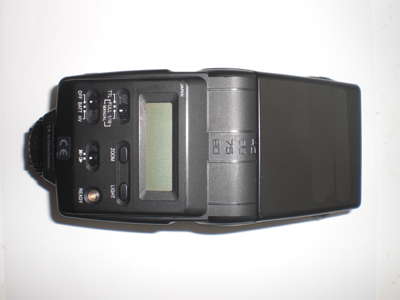 |
| Flash / Strobe |
Although it is not always night time I always carry a flash, I just think you never know when you might need one, even on the brightest sunny days with the sun behind your subject you will need to light then at the front with something, and other than a reflector a flash is a great way to do this.
Gels
 |
| Flash / Strobe Gels |
Gels are a really cool way to add that something extra to your shots, and as they are so light to carry keeping them with my flash in my kit bag does not add anything to the weight, but can add a whole lot to my shots.
As you can see in the picture above I use velcro dots to attach my gels to my flash, simply stick one on either side of the flash and one on each end of the gel.
Tripod
Although I dont carry my tripod to ever shoot I do carry it alot and my chosen tripod is a Red Snapper tripod, and although these tripods get mixed reviews online I find it to be light enought carry, yet strong enough to hold the camera firmly.
For more info on Red Snapper Tripods check out http://www.redsnapperuk.com/
Ok thanks for reading about whats in my kit bag, so what do you have in your kit bag that you could not live without? answers please in the comments section.