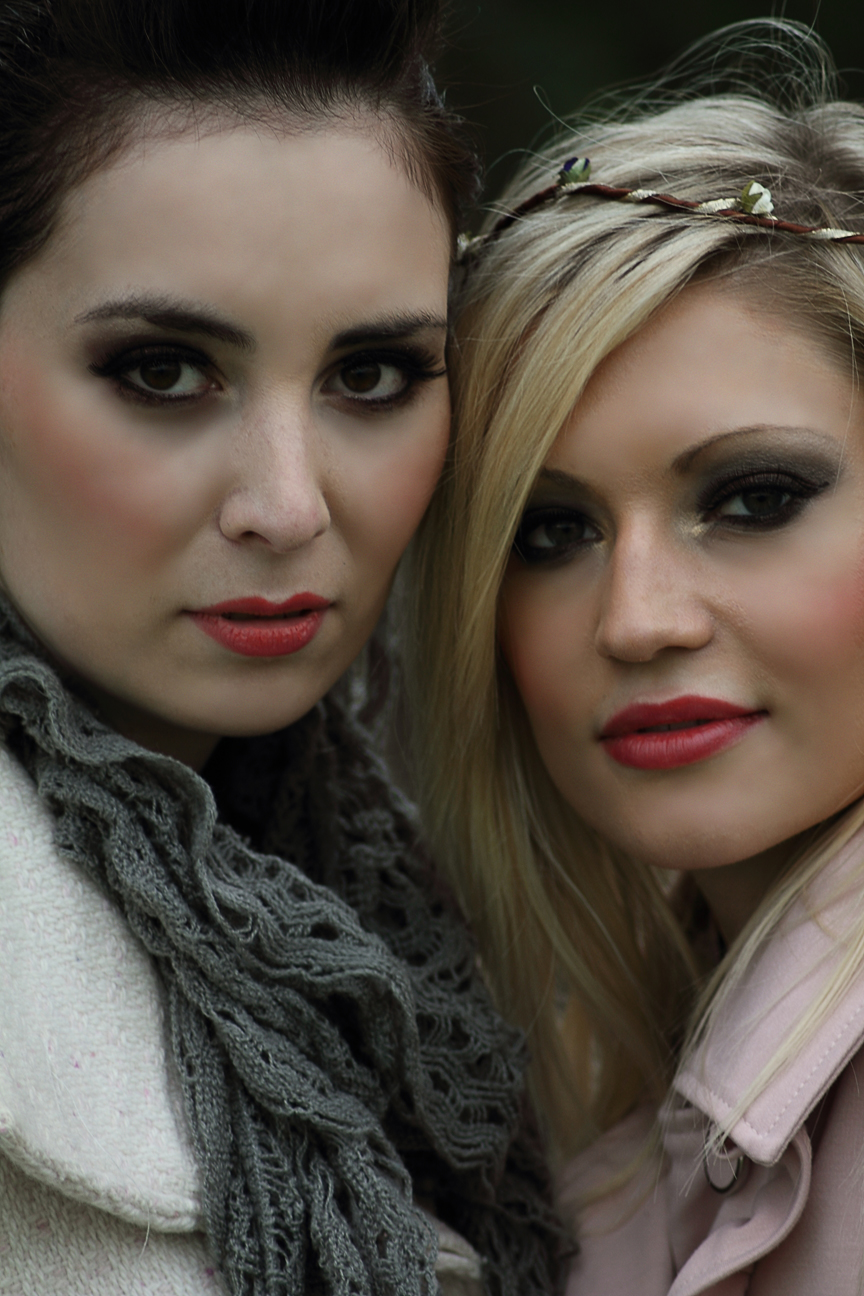
LATEST SHOOT NEWS: Currently seeking models. Get in touch.
CT Magazine is Relaunching Soon. Get in touch be featured.
LATEST BLOG NEWS: To Edit or Not To Edit – Check it Out Now
Sean J Connolly PhotographySean J Connolly PhotographySean J Connolly PhotographySean J Connolly Photography
  • About Me
  • Portfolio
    • Fashion and Lifestyle Photography
    • Location Photography
    • Event Photography
  • Google + 360 Photography
  • Blog
    • Resources
  • Contact
  • About Me
  • Portfolio
    • Fashion and Lifestyle Photography
    • Location Photography
    • Event Photography
  • Google + 360 Photography
  • Blog
    • Resources
  • Contact

How to Reduce Light Stops Entering Camera by Using F-Numbers

  • 0 comments/
  • August 25, 2016

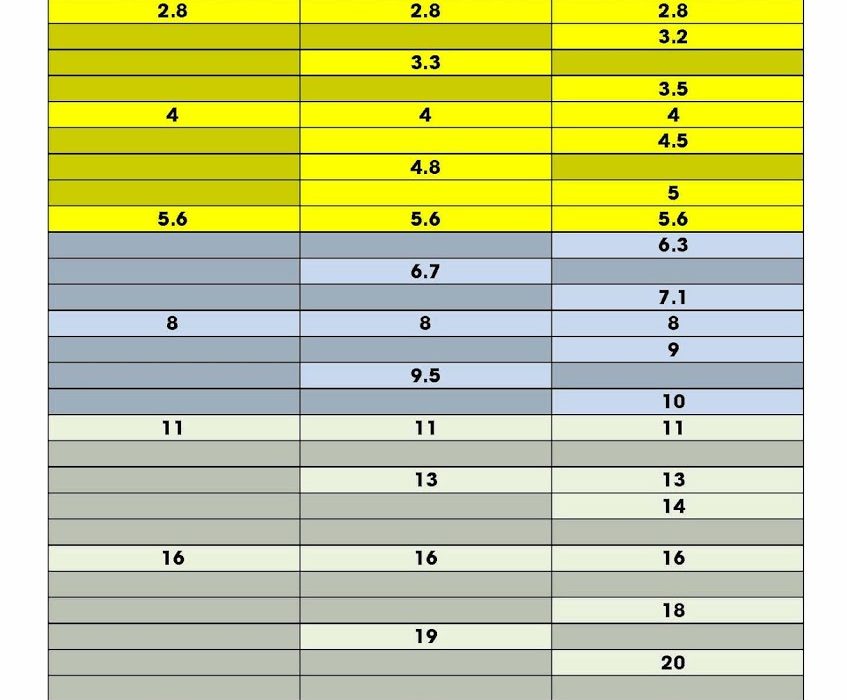
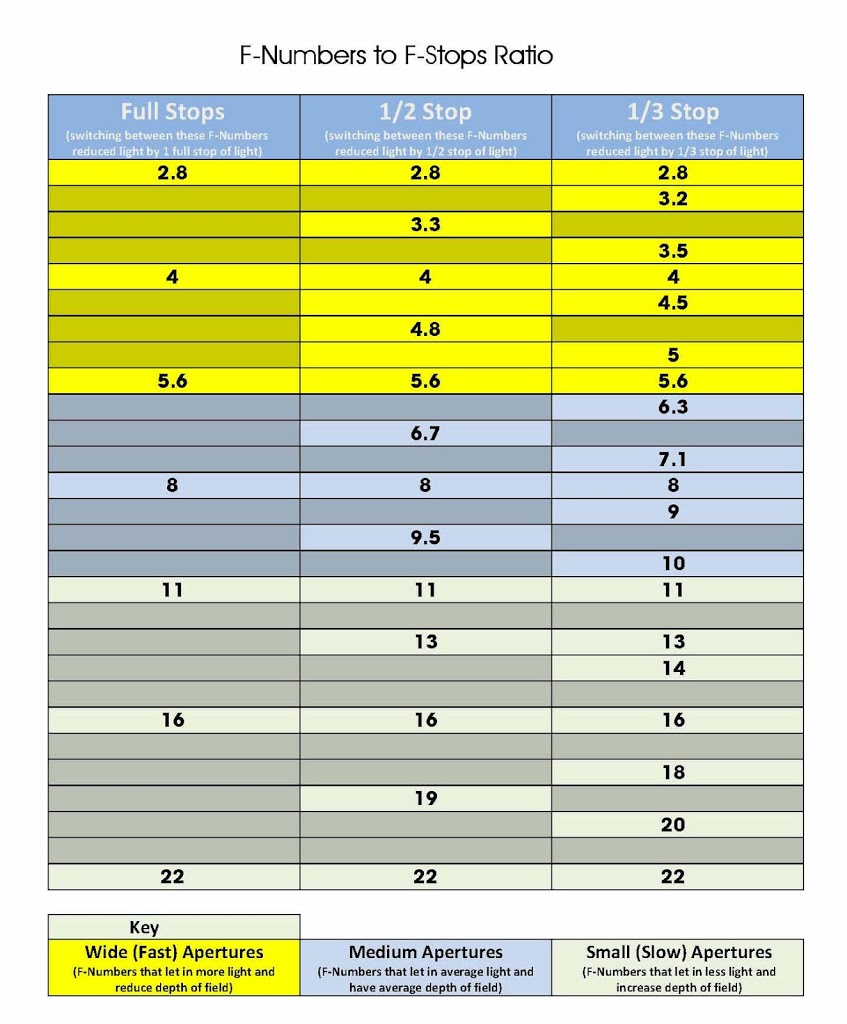
So rather than try to write a description about the numbers I decide to draw up a chart.

Please feel free to download this chart for your own use, and if you do wish to share it, please credit me. Thanks

How to use the Chart

The chart is pretty simple to understand, along the top are 3 columns, starting with Full Stop, 1/2 Stop then 1/3 Stop, reading down each column you see the camera F Numbers. The gap between the F Numbers is the amount of light you are reducing or increasing into the camera.
Lets say you want to reduce the light by 1 Full Stop of light, simply look at the first column titled Full Stops and switching the F-Number on your camera between these settings will decrease or increase the amount of light accordingly. Using the second column and switching between these F-Numbers will reduce light by 1/2 Stop and finally switching between the F-Numbers in the 3rd column will reduce light by 1/3 Stop.
I hope this all makes sense, any questions just let me know in the comments.
PDF DOWNLOAD
JPG DOWNLOAD
  • Under : camera, CAnon, f number, f stop, how to reduce camera light, lens settings, light, light painting, need to know, photography, ratio

Using Polarizing Filters to reduce Reflections when shooting through glass

  • 0 comments/
  • July 19, 2014

We are all aware of the use of filters in photography, and mainly in the world of Landscape, Nature or Architectural photography.

But what if I was to say that they also have a place in the world of portrait and fashion.

The main filter I want to tell you about is called a Polarizing filter, if you have not heard about it, its simply removes glare by removing elements from the light spectrum, not going to bore you with all that now 🙂

If you want to know a bit more about polarizing filters and other filters check out my other post

So What Use is a Circular Polarizing (CPL) Filter to my fashion photography?

We  the issue came to my mind when my fiancee was having some photos taken for a magazine article, although the photographer seemed to know what he was doing and the shots taken looked great. There was a time at the start of the shoot when he had arrived at the house, he thought it would make a nice shot to shoot through our lounge window, with my fiancee looking out. Which sounds like a good idea.

So he set about setting up for this shot, he went into his bag and took out a black sheet. Which he handed to his assistant, and told her to hold it up to blog the reflection on the window. Think what he was forgetting is that he as not blocking a reflection, but just reflecting the black sheet instead.

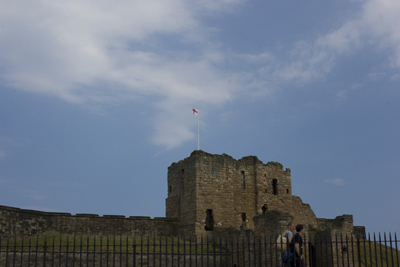
What he should have done instead was to use a Polarizing Filter, as the purpose of this filter is to not only reduce glare, but reflections too. You can see the effect on the sky in the following shots.

With Polarizing Filter

Without Polarizing Filter

As you can see the filter has removed the glare from the shot and made it clearly, this works the same when shooting through water such as a lake or a river, as well as when shooting a subject through glass.

The main thing to remember is that if you are using a polarizing filter on your DSLR camera, you must use a Circular Polarizing Filter as it will allow your auto focus to work correctly unlike a Linear Polarizing Filter which can have an effect on the auto focus.

So remember, as I do to add a Circular Polarizing Filter to your kit bag.

  • Under : cpl filter, how to reduce reflections, how to shoot into a stream, how to take a photograph through a window., need to know, polarizing filter, shooting through glass

How to Setup Canon 7D to take HDR shots / Bracketed Exposure

  • 32 comments/
  • April 6, 2012

Ok so you have heard the word HDR, Bracketed Exposure and Auto Exposure Bracketing. But what do they mean and how can you use your Canon 7D to take these sorts of shots.
Ok first things first what is HDR, Bracketed Exposure and Auto Exposure Bracketing.

HDR stands for High Dynamic Range, and it is a technique in which you merge several shots together all with a different dynamic range or exposure. HDR is mainly used in landscape photography as it allows you to show light at all levels of the image, bringing out details and colours you would not see in a single shot. These shots are created using software packages such as Adobe Photoshop Elementswhich let you create the HDR effect or final images, check out the excellent video tutorials by Just4Photographers.com on using Photosjop.

One of my favourite HDR photographers has to be Trey RatcliffI think his work is astounding.

A fantastic E-Book I recently bought How to do Trick Photography by Evan Sharboneau is amazing, is really takes some of ym article concepts to a whole new level, adn I recommend downloading and giving it a read, you will not regret it.

Bracketed Exposure is a term used when referring to a set or series of the same image each one taken at a different light stop, in short the first image will normally be dark (under exposed), the second will be “technically” spot on and the third shot will be bright (over exposed).

Auto Exposure Bracketing (AEB) or Auto Bracketing (AB) is the ability of the camera to be setup to take a series of photos all with different exposure levels, this means that you dont have to manually make changes to get your set of Bracketed Exposures, the camera does all the hard work

HDR (High Dynamic Range), Bracketed Exposure, Auto Exposure Bracketing on the Canon 7D

So before we can create any HDR photographs we need to collect a set of images that have a different exposure, and in short the more the merrier. Now there are two ways to do this the Easy way and the Hard way.

Now you are getting to grips with the AEB I recommend checking out Geoff Lawrences guide to Digital Photography you wont regret it

Hard Way to Take Bracketed Exposure Photographs on Canon 7D

Setup your camera with the normal setting you choose to use and take a set of photos, the more the merrier and for each shot alter the shutter speed, normally setting it too high such as 1/400 sec or similar, so that your first shot is too dark, then reduce your shutter speed to say 1/350 sec and take another shot. Then repeat this process until you have a set of images, 5 is a good minimum but like I said before the more the merrier. For some amazing example of the techniques we will cover here please take a look at the International Hall of Fames Terry Day’s work and his course.

You now have a set of bracketed exposure shots.

“Not really all that technical now was it”

“But Sean” I hear you shout “you said there was an Easy way and a Hard way, so whats the easy way?”

Technicall there are two easy ways one is to take a look at the Focus Emagazine as it has loads of tips and snippets for your to use, or follow the tips below.

Easy Way to Take Bracketed Exposure Photographs on Canon 7D

The instruction and guidance here are specifically based around Canon DSLR’s in particular the 7D, all decent DSLR Canon, Nikon, Hassleblad are capable of auto exposure bracketing, but the setup will be different.

Setting up the Canon 7D for auto exposure bracketing (AEB)

There are 3 main steps to taking auto bracketed shots.

  1. Set the camera drive to High-Speed Continuous
  2. Set the Exposure Bracketing Sequence
  3. Set the Exposure / Auto Exposure Bracketing
Note – these instructions are done with the camera set to full manual or M mode.

1. How to set the Canon 7D camera drive to High Speed Continuous

The first thing we need to do is set the drive speed on the camera to “High Speed Continuous”, this can be done in a variety of ways. My personal choice is to use the button on top of the camera and then set the speed either by using the top screen or the back of the camera. Although for this tutorial I am going to use the quick menu “Q” option.

a. Press the Quick Menu “Q” button on the back of the camera, located to the left of the screen.
b. Using the little joystick, located to the right of the screen. Select the Drive Mode menu and press the set button

c. Now select the High Speed Continuous option, the second option along on the screen, and press the set button.

2. How to set the Exposure Bracketing Sequence on Canon 7D

The next thing we need to do is change the Bracketing Sequence, this means that our photos will come out in the correct order from dark to light.

a. Click the menu button on the back of the camera (located just to left of the rear screen)
b. From the Custom Function Menu, second from the end in the top row of options in the menu screen, select the Exposure menu (CFn I: Exposure) option and press the set button.

c. Then scroll through the menu options to number 5, Bracketing Sequence, and select the second option, the one marked “-,0,+” and press the set button.

Ok now press the menu button to come of the menu, and you have now set the bracketing sequence. This means that when we take our shots we will get a dark photo, a normal photo and a light photo.

It should be noted that due to a slight limitation on the Canon 7D it is only possible to take 3 auto bracketed shots at once, hence the option of only a dark shot, normal shot and a light shot. But dont worry I will let you in on a little tip later to overcome this.

3. How to Set Auto Exposure Bracketing (AEB) on the Canon 7D

Now we have set the order of out shots we must now set the Auto Bracketing Exposure (AEB)compensation for the shots.

a. Go back into the menu, if you forget where the button is its still located on the back of the camera  to the left of the screen.
b. Select the Exposure / Auto Exposure Bracketing (AEB) option, the first option under the second icon along on the menu screen and press the set button to enter the menu

c. Now press the set button and using the small wheel, location on top of the camera, move the indicators apart until you have the indicators either side of the centre pointing at number 1.

d. Press the set button to save the option, then use the menu key to out of the menu.

Ok your camerais now setup to take a set of three shots, each one with a different exposure. Again note that due to the limitation of the Canon 7D you can only take 3 auto bracketed shots at once.

So what you need to do to get a complete set of photos Auto Exposure Bracketed photos for your HDR is take your first set of 3 photos, then go do the following

a. go back into the menu, and yes it is still located on the back of the camera to the left of the screen.
b. Again selected the Exposure / Auto Exposure Bracketing (AEB) option, the first option under the second icon along on the menu screen and press the set button to enter the menu

c. Now this time when you select your Exposure Compensation / Auto Bracketing Sequence (AEB) more the indicators to number 2.

d. Then press set and use the menu key to come out of the menu and take another set of 3 shots. Then redo steps a – c above but this time set the indicators to number 3.

e. And again press set to save and use the menu key to exit the menu and again take your shots.

Now you will have a series of photographs that are all at a different exposure, all you need to do is disregard the two repeated shots from the second two sequences, basically in the first sequence you took photos that were exposured as “-1,0,+1” you then took a set of shots that were exposed as “-2,0,+2” and finally you took shots that were exposed as “-3,0,+3”. As you can see you have 2 repeated shots both at normal exposure or “0”. So you can just deleted these shots from your series or just leave them and let your HDR software worry about them, thats up to you.

You can now simply load the shots into your chosen software package and create your HDR photos. I will post later about how to do this in Photoshop, but there are tons of HDR packages available and even website that can do ti for you.

“But Sean what about your little tip?”

Ok before you send round the heavy’s I have not forgotten about my little tip. So here it is.

When you are using your camera to do any type of Auto Exposure Bracketing, due to a limitation on the Canon 7D it only allows you to do 3 shots at a time, and have a set of 3 photos with different exposure. This means that each time you do any HDR shots of any decent level of AEB photography you are left with insufficient shots, and need to repeat step 3 above, each time change the indicators for each set.

You also don’t want you camera settings to stay on these setting for most of the time you use it, so in order to make life easier heres my little tip.

The Canon 7D has the ability to save camera settings for future use. If you have ever wondered what the C1, C2 and C3 options on the top mode selector control dial are for they allow you to recall preset saved settings simply by turning the dial.


How to Save Custom Camera Setting on Canon 7D

In order to save your setting ready for your next Auto Exposure Bracketing photos, simply follow the steps 1 to 3 above, so that you have the final indicators pointing at number 1. Save the options and come out of the menu. Then do the following

1. Go into the menu using the menu button, that is, yes you guessed it, located on the back of the camera to the left of the screen.
2. Select the third option from the right and select the Camera User Settings Menu

3. In this menu select the Register Option

4. Now select the option for Mode Dial: C1

5 Press the set button and then select OK and click set to save.

Now repeat the setup steps above to setup your camera for Auto Exposure Bracketing, but when you come to step 3 make sure the indicators are pointing at the number 2.. Now repeat the steps here and instead of the Mode Dial: C1 select Mode Dial:C2. Then repeat again making sure the Auto Exposure Bracketing indicator is pointing at 3 and then select Mode Dial: C3.

Once you have done this, you can either reset your camera setting using clear all camera settings, as seen in step 2 just above, or manually put your camera back to your normal settings.

Now each time you want to do any Auto Exposure Bracketing you can simply select C1 on the mode dial, then C2 and finally C3, you camera will do all the work for you and when your finished just return your camera back to what ever mode you normally use.

Doing this little tip allows you to recall the right Auto Exposure Bracketing (AEB) setup without the manual hassle simply by turning the mode dial.

Ok thats it, now go off and take some nice photos and if you are using a mac you may want to try Remo Recover to safe guard your cool new shots.


  • Under : AEB, auto exposure bracketing, bracketed exposure, c1, c2, c3, canon 7d, hdr, HDR photography, how to set up canon 7D for Auto Exposure Bracketing, Mode dial, need to know, saving custom setting Canon 7D

Spofforth Castle Wetherby Fashion Shoot – Jenna Duffin

  • 0 comments/
  • November 7, 2011

Model : Jenna Duffin / Becky Magson
Make Up Artist : Jenna Duffin
Location : Spofforth Castle, Wetherby
Type : Fashion

This shoot was one that I had been looking forward to for ages as there was lots of work  put into the planning, and there was lots of time deciding on the type of shoot, the fashions for the shoot, the location and finally the make up. The whole thing was made a lot easier as one of the models Jenna is a make up artist, so she had lots of ideas on the look for this shoot, keeping in mind my simple brief of a “light and airy shot”.

As Becky, Jenna and I had worked together on a previous shoot (althought not one of mine), there was already a great rapport which made the whole thing go so smoothly.

The intial idea of this shoot was to add more people into my portfolio and as I had taken lots of shots of Becky before, this shoot was to centre more around Jenna in order to start my portfolio off with a bit of variety.

Hair and Make Up

The look we decided on for this shoot was a light and airy natural feel, and after loads of emails with Jenna about the makeup we finally decided on the look for the shoot, well to be honest the actual look was more Jenna than me, all I knew was I wanted an airy feel (how she managed to come up with the fashions and make up still amazes me).

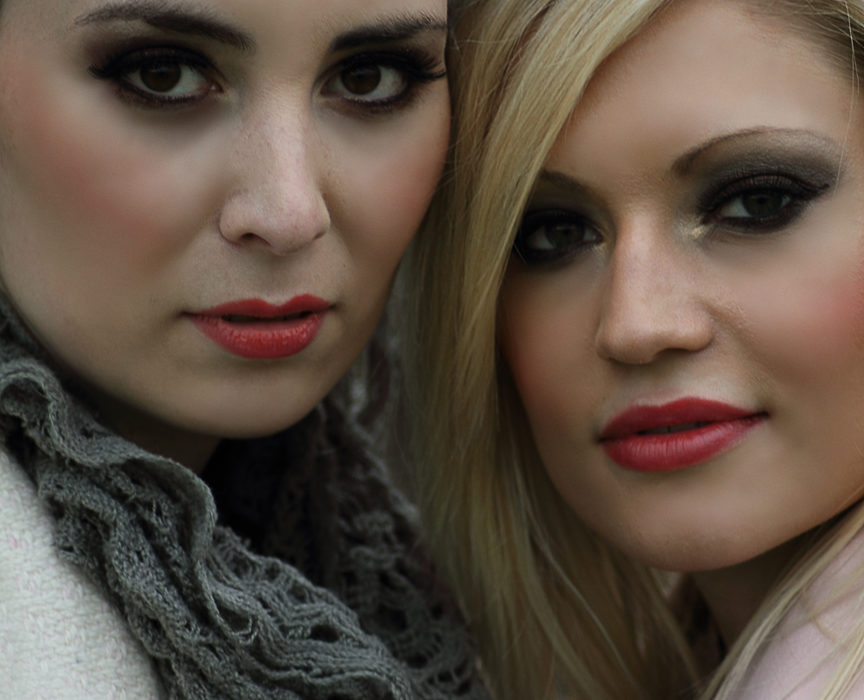
So on the day of the shoot we arrived in Wetherby and Jenna set about doing the make up, this took the normal amount of time for a fashion shoot, about an hour. The end results were amazing, the look and feel was exactly what I wanted. Not too much make up and a natural daytime look.

So once the makeup was all done and outfits chosen, we set off for the location. Spofforth Castle in Wetherby.

Location

On arriving at the location, it was necessary to be a bit hush hush about the shoot, as the castle is an English Heritage site and they dont take too kindly to photography in their properties.

But the location was just amazing, there was lots of different areas to play around with and as each of these areas had different lighting it made it even better as this meant I could play around with not only using some gels, but also use the reflector for some shots.

The only down side of this location was that as it is a public place there were people around, and in particular one family who kept on walking past the area we were shooting, in fact there kids just kept being annoying and just running everywhere. It wasn’t the fact that they were in the area, more the fact that we had our bags in the area. So as you can guess this was a pain.

However this location did have some very cool surprises up its sleeve, it had a little dark room were Becky and Jenna could get changed between sets, kinda useful and not often found on location shoots.

The Shoot

Ok so we got underway with shooting, and the initial shots were taken, and as it turns out theses shots were more of a get a feel for the lighting and location, than great shots. Lets just say they turned out not so great, I would even go so far as to say rubbish.

However, once we got further into the shoot the lighting was working really well, and the poses were really working, very natural and soft. Just the look I was after. So we took some shots in the main part of the castle and they just popped.

Part of the castle is old stairwells and windows, all of which really worked for amazing backdrops, either because of the excellent ambient light, or because the flash just bounced around perfectly. Also the fact that Jenna was happy to try anything to get the shot, even holding the lightstand meant the shots that we got are really excellent.

We then moved onto the stairway in the castle, which threw up all sorts of lighting challenges, as there were really bright areas, really dark areas and hugely light absorbant surfaces everywhere. But this made the shots better, I decided to use a mix of backlit gelled shots as well as front lit reflected light shots. Must be honest and say that these shots are some of the best of the shoot. We even got some very close beauty shots using this great light.

It made it even better as Becky has been so used to holding the reflector in the past, meant I got some great beauty shots of Jenna, which show both the beauty and the make up in the shots.

Then finally we moved to the outside of the castle, and due to the fact that its an old castle we were able to get some great shots of the ruins in the background, and even sitting on them. These made amazing advertising type shots, and were good enough to go on my website.

All in all I am so happy with the outcome of this shoot, extra please that the effort put in by Jenna in the initial planning on the outfits and makeup as it made the shoot just work, which also meant I got a sets of images that are totally different looks all from one shoot.

But as always you can be the best judge of the shots, and please comment as to whether you like the shots or not.

Sample shots from Spofforth Castle Photo Shoot
To see some of these shots in full size please visit my gallery on my website http://seanjconnollyphotography.co.uk/photography_gallery.htm
  • Under : becky, behnd, castle, duffin, fashion, jenna, magson, need to know, photo shoot, photography, scenes, sean j connolly, spofforth, the, yorkshire

  1. DSLR Controls
    1. Front Controls
    2. Back / Rear Controls
    3. Top Controls
    4. Left Controls
  2. Camera Talk
    1. Why Buy a DSLR
    2. Canon or Nikon?
    3. Camera Lens
    4. Canon 7D Soft Focus Fix
  3. Learning Zone
    1. Photography Golden Triangle
    2. Photography Tips
    3. Common Photography Terms
    4. Types of Photography
    5. Lighting
    6. F-Number to F-Stop Chart
Notable Posts
  • How to Reduce Light Stops Entering Camera by Using F-Numbers
  • Using Polarizing Filters to reduce Reflections when shooting through glass
  • How to Setup Canon 7D to take HDR shots / Bracketed Exposure
  • Spofforth Castle Wetherby Fashion Shoot – Jenna Duffin
Recent Posts
  • To Edit or Not To Edit – That is the Question!
  • Photography Tips for Beginners
  • Photography Golden Triangle
  • Reviews
  • Smoke Bombs and High Fashion
Archives
  • February 2019
  • January 2019
  • December 2018
  • November 2018
  • August 2016
  • March 2016
  • October 2015
  • June 2015
  • May 2015
  • July 2014
  • April 2014
  • December 2013
  • May 2013
  • March 2013
  • December 2012
  • November 2012
  • October 2012
  • September 2012
  • July 2012
  • June 2012
  • May 2012
  • April 2012
  • March 2012
  • February 2012
  • January 2012
  • December 2011
  • November 2011
  • October 2011
Privacy Policy
Copyright Sean J Connolly Photography 2018. All Rights Reserved